准备工作
Github
- 登陆你的Github
- 新建一个Repository
- 将之命名为yourGithubName.github.io(注意替换yourGithubName)
- 关键步骤已经完成,其他选项随意啦。点击新建后,别忘了把SSH的地址copy一份,后面有用到
Hexo
- 打开终端
- Hexo依赖 Node 环境,如果没有先安装 Node & npm,参考官网
- 安装 Hexo
npm install -g hexo - 齐活,Hexo准备完毕
开始使用Hexo撸Github需要的东西
- 进入到你想放置github pages repository的目录
- 在此创建Hexo Project
hexo init yourGithubName.github.io - 切换到刚刚创建的目录
cd yourGithubName.github.io - 安装依赖&生成静态文件&启动本地服务器
npm install & hexo g & hexo s - 目测现在就可以通过访问localhost:4000来瞅瞅网站啥样了
部署到Github上
- 首先,停掉Hexo
Control + C - 打开根目录的_config.yml,设置Github地址
deploy: type: git repo: git@github.com:yourGithubName/yourGithubName.github.io.git - 部署前,先确认有没有安装hexo-deployer-git
npm install hexo-deployer-git --save - 部署
hexo d - 打开浏览器,访问 yourGithubName.github.io
写作
- 使用Markdown写作,完事后保存到source/_posts/
- 重新生成静态文件
hexo g - 运行
hexo s在本地查看刚刚写的文章 - 木问题的话,更新至Github
hexo d
绑定自己的域名
我通过淘宝代理Godaddy购买了 zerosoul.github.io 域名,就拿这个举例如何绑定吧
- Github上进入 zerosoul.github.io
- 创建并提交CNAME文件,里面只有一行内容,就是域名:
zerosoul.github.io - 去Godaddy网站管理域名页面
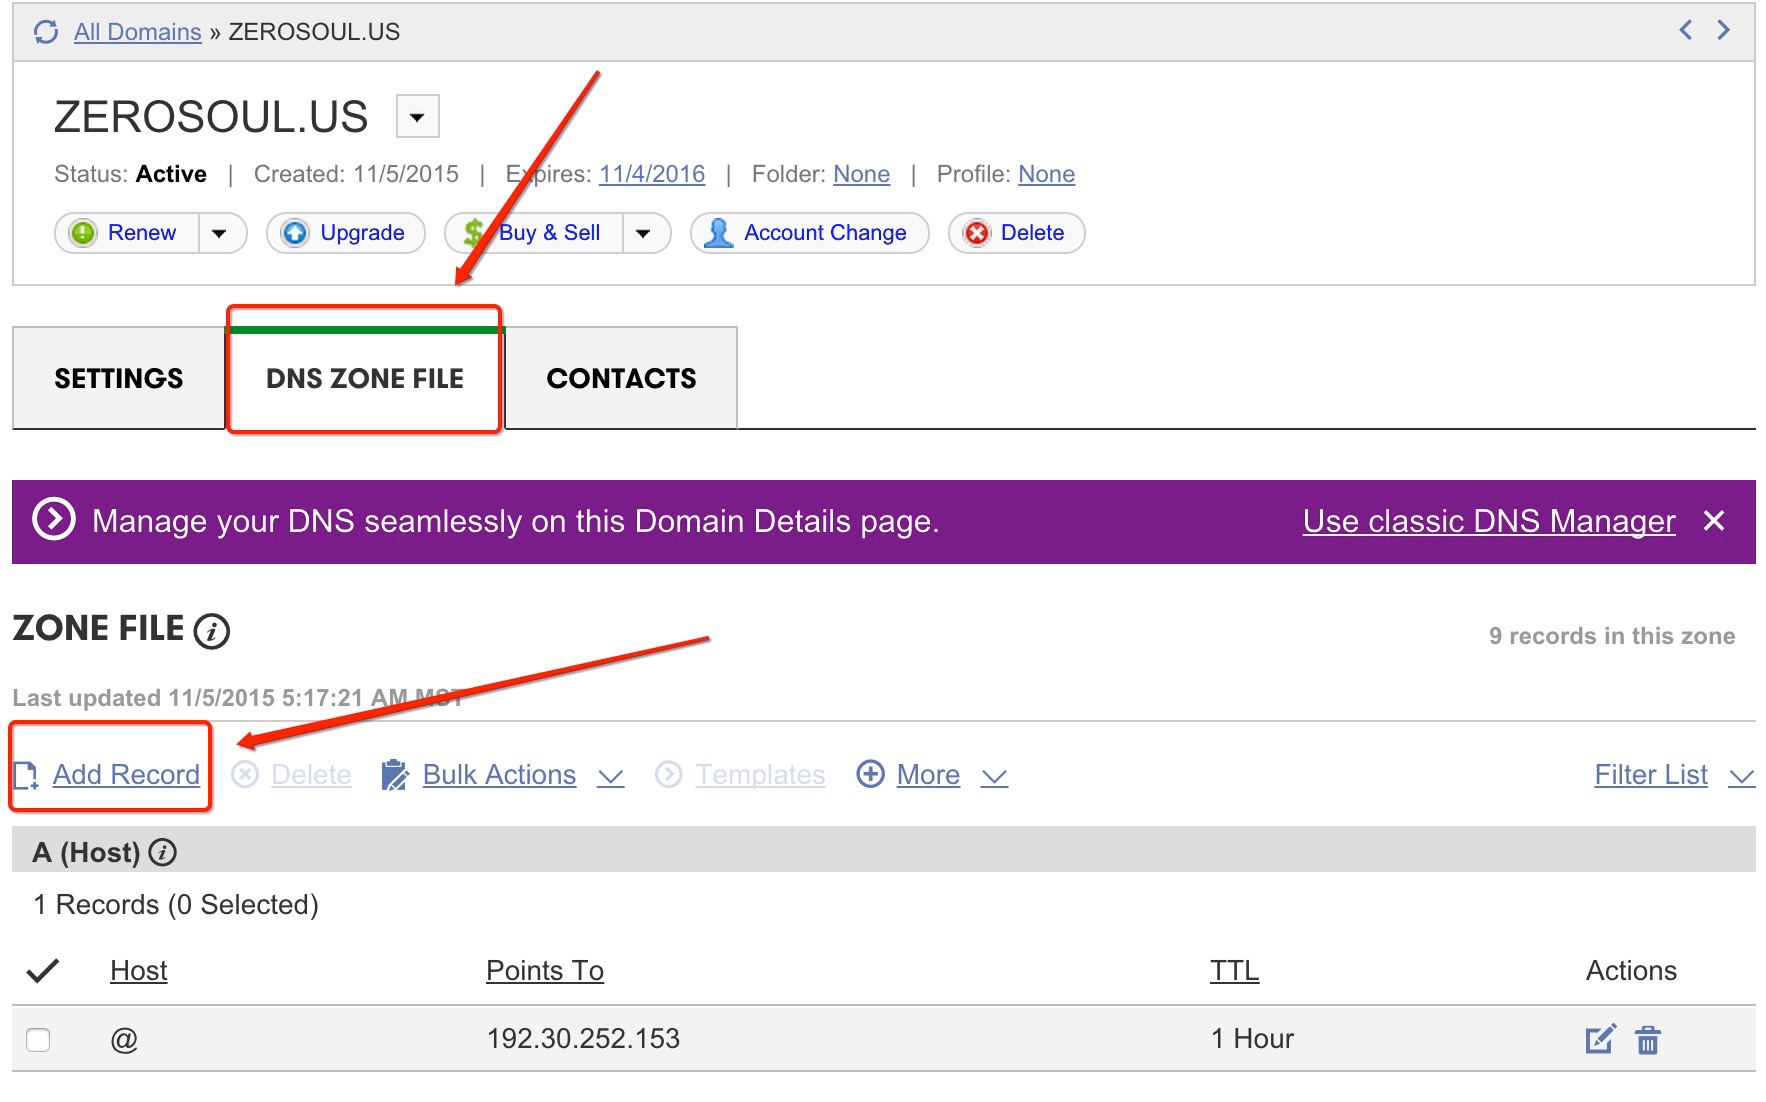
- 增加一条 A 记录:host=
@,Points to=192.30.252.153 - 增加一条 CNAME 记录:host=
www,Points to=zerosoul.github.io - 最后,一定要记得保存更改!
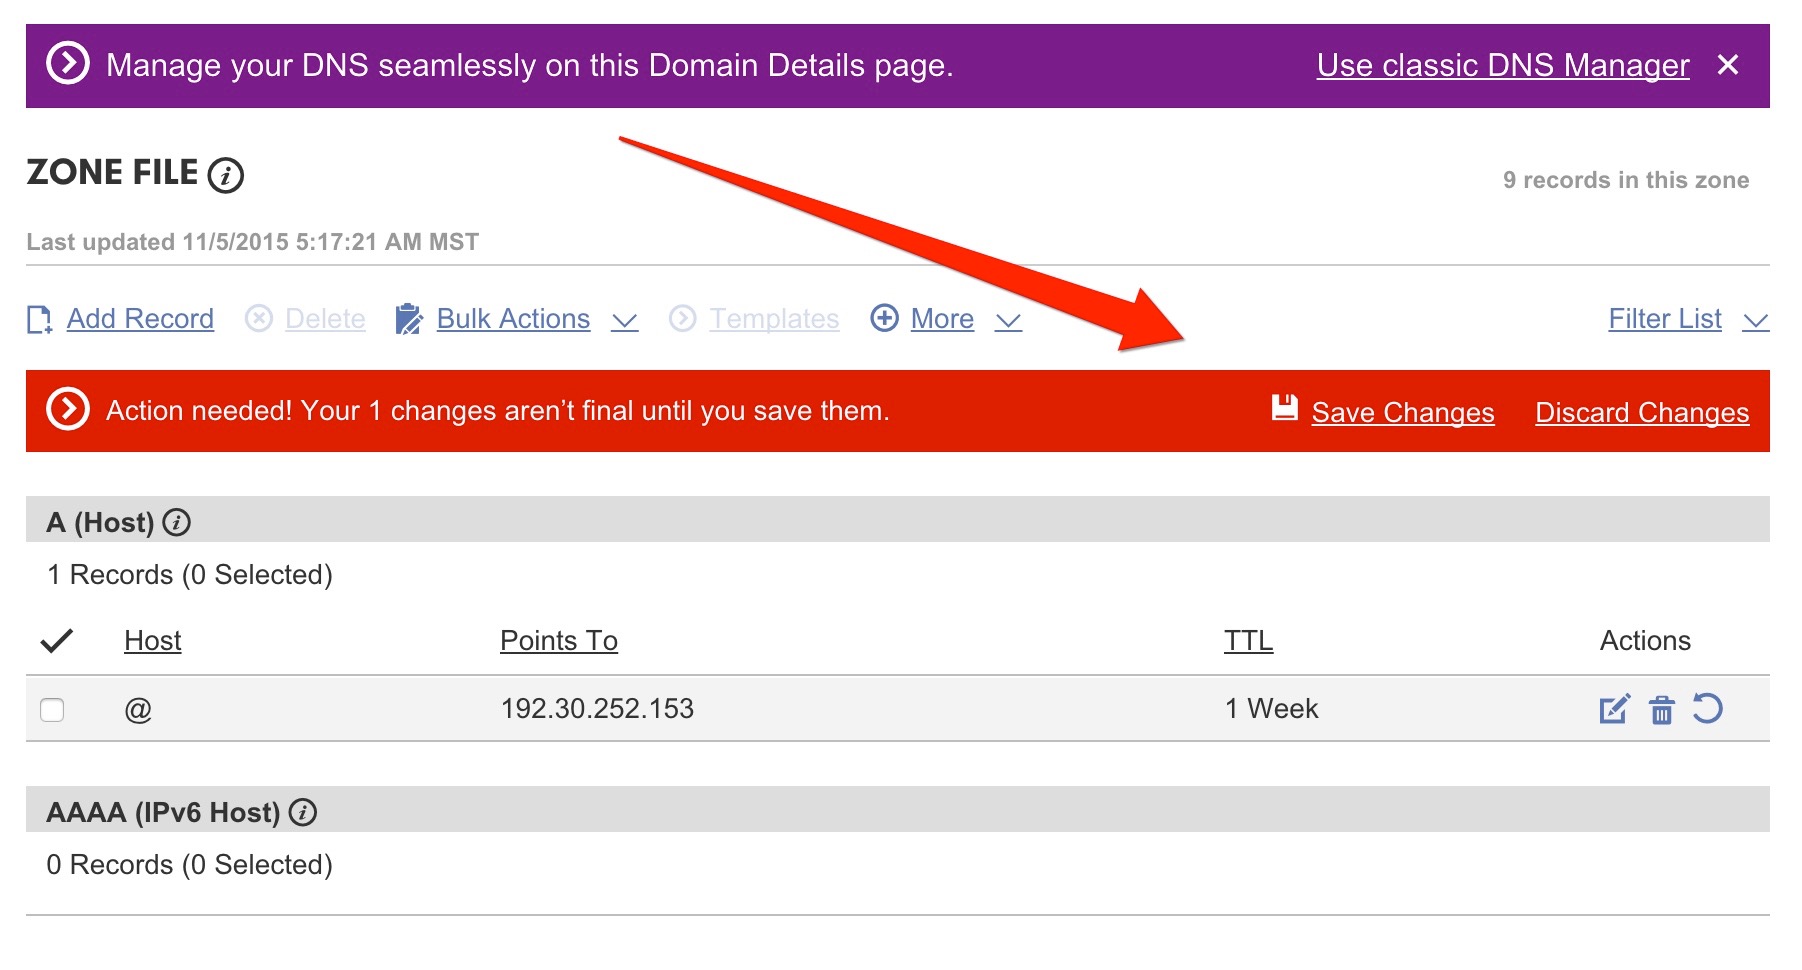
- 静待更改生效,大概一两个小时。
两个小时后…
装X成功!
相关链接
hexo doc
github pages basic
Configuring a Godaddy domain name with github pages

